**This is a very old and terribly lit tutorial that I transferred from my original Wordpress blog. This 10+ year old tutorial has been popular and helpful to many over the years. I have left it in its original "charming" state!**
Below are some recent photos of the quilt I finally finished using some of the blocks in the tutorial. I love it!


Here are some updated photos of a quilt I made using this method. This quilt took me about 10 years to complete which is why the fabrics look so vintage. It's one of my favorite things about this quilt.
______________________________________________________
Like many of you, I often have overflowing bins of scraps. There is something so satisfying about saving and eventually using up even the smallest bits of fabric, knowing that you utilized that well loved print or solid to the nearest inch or so. I enjoy trying out different ways to use these precious scraps with a variety of sewing and quilting projects.
One technique that I have recently been having fun with is what I call my Half Square Triangle {Scrappy Strings Style} String Block, a basic Roman Stripe block.
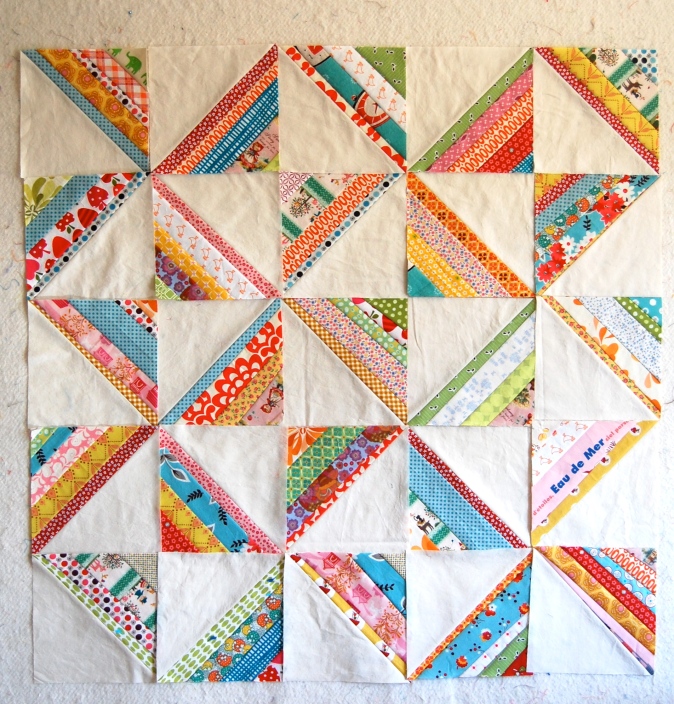
I came up with this method out of necessity while trying to make a quilting experiement work and save it from the eternal UFO (unidentified fabric object) pile. The resulting finished quilt top shown above is just one example of how you can use these HSTs; more layout options shown at the end of this tutorial.
So let’s get to it….
Materials needed for two 8 inch blocks:
**two- 8.5 inch squares of muslin- I have tried paper but feel that the muslin gives the strings more support and keeps them from shifting around, AND I just like the feel of fabric over paper (in my more updated version of this technique I do use paper- I mostly try to find clean (with some print is fine) pieces that are already destined for the recycle bin).
**two- 8.5 inch squares of background fabric (I used Kona Snow here)
**a variety of scrappy strips of fabric (fat quarters cut into strips work nicely here as well)
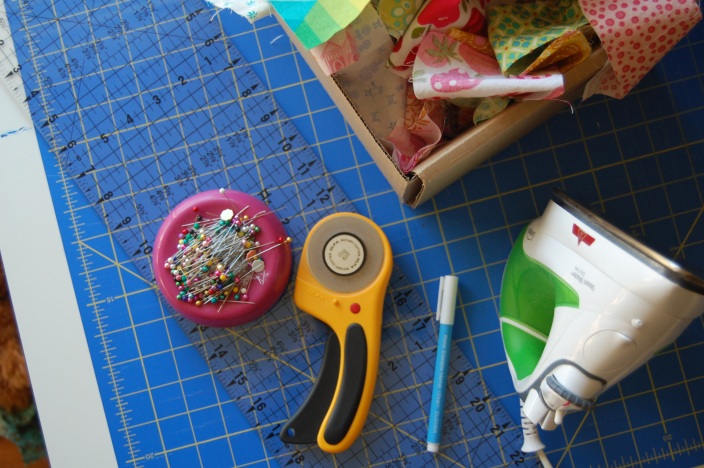
**and of course an iron, rotary cutter, disapearring ink marker, cutting mat, plexi ruler, pins, sewing machine and some good thread (not shown).
All seams sewn at a 1/4 inch!
Step 1:
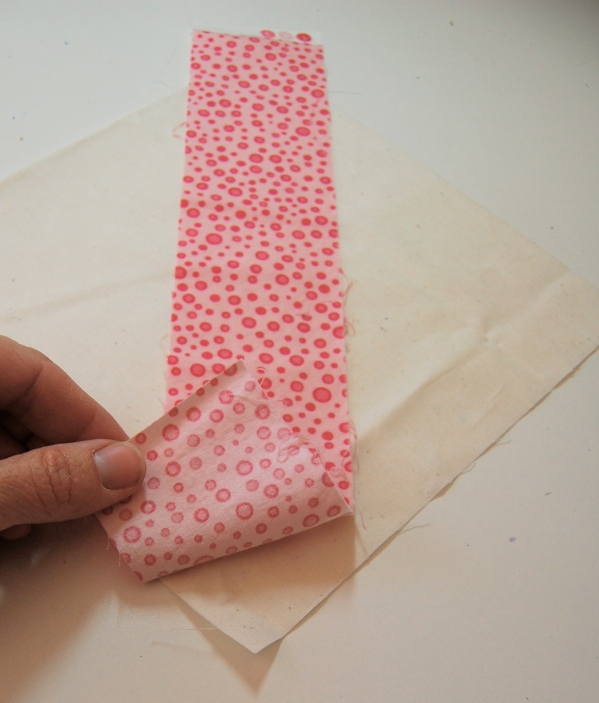
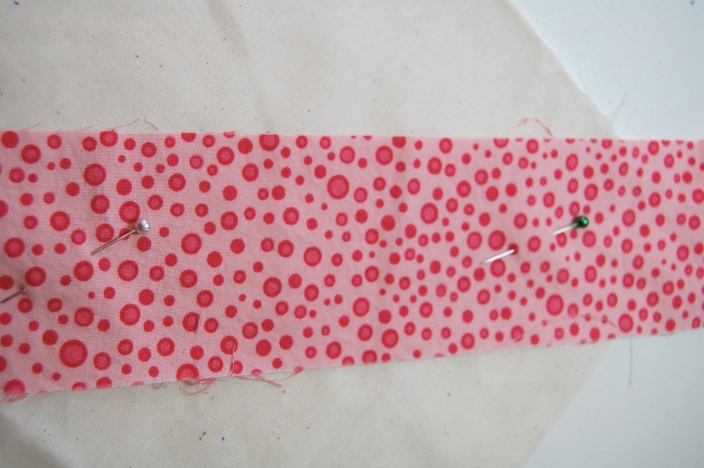
Lay out your muslin (or paper) square and choose your center strip. It is best to have this strip be on the wider side- about 2 to 2.5 inches. Lay this strip out centered on the diagonal, corner to corner. Be sure the strip is longer than the square itself.
I like to put a pin or two in at this point to hold it steady before I sew my first strip to it (when using paper, I just dab a few spots of glue stick glue on the paper and smooth out my fabric on top of that).
Step 2:
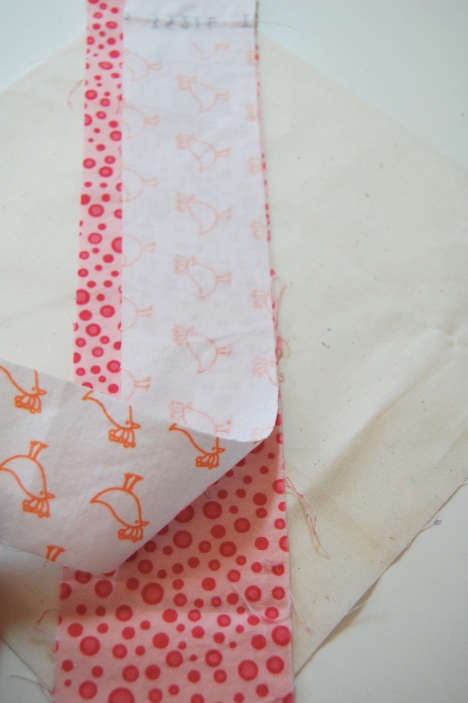
Now you are ready to place the next strip. Place strip on top of center strip with right sides together, edges aligned.
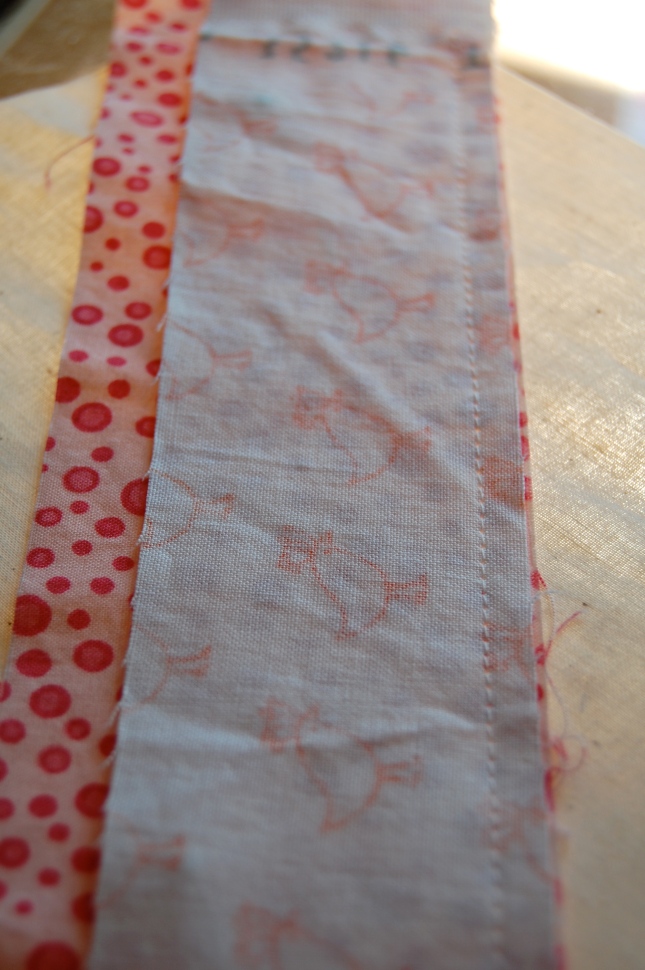
Gently invite your muslin to be somewhat taut here as you sew this strip in place. Repeat this step with another strip on the other side of the center strip.
Step 3:
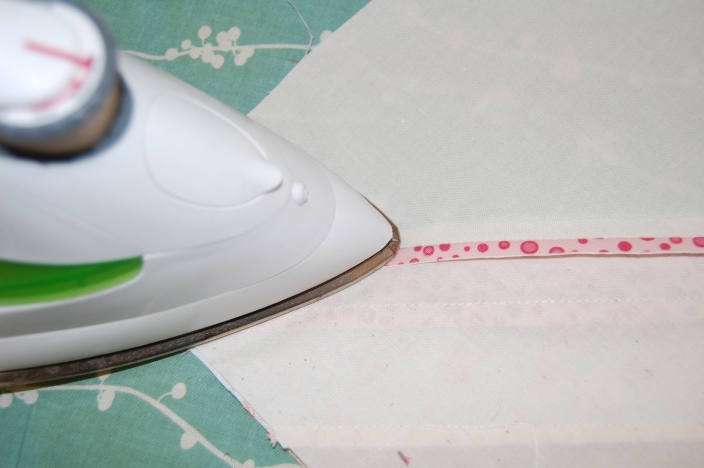
Press seams to the side.
Step 4:
Repeat step 2 by placing your next strip in place on one side of the square, and again on the ther side of the square.
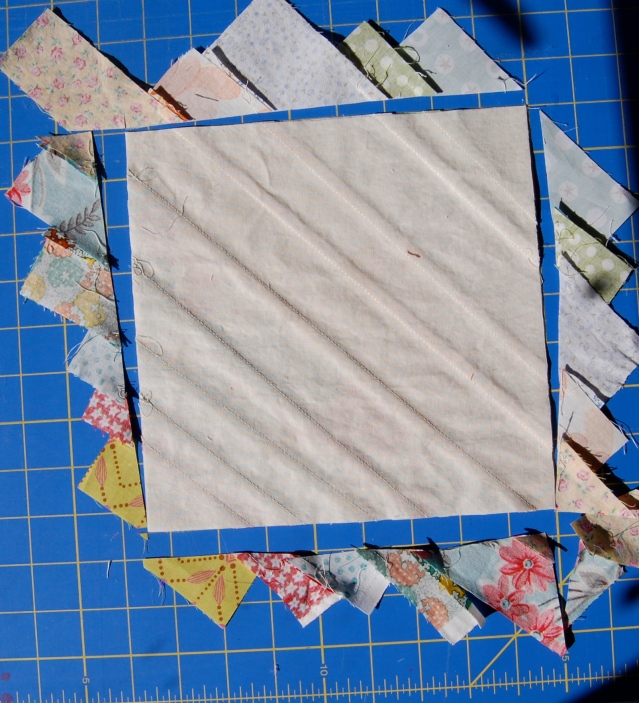
You will continue repeating this step until you have sew enough strips together to cover the entire square. Your square should look something like this on the back side when finished.
Step 5:
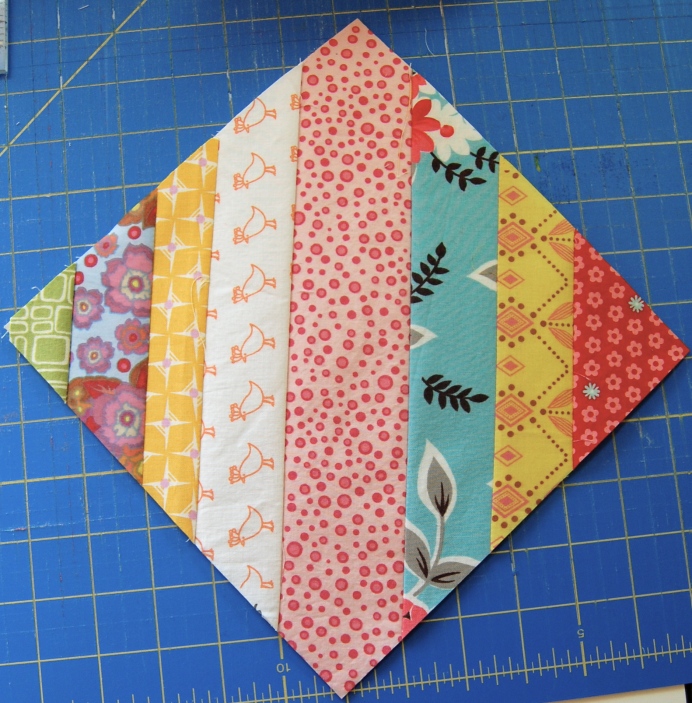
Trim the edges of your block to a nice, clean 8.5 inches (this is a different block than above-forgot to get this photo on the other one).
Your block should look something like this at this point. Pretty just like this, and you could do something fun with this in a quilt, but we have just a few more easy steps to create an HST!
Step 6:
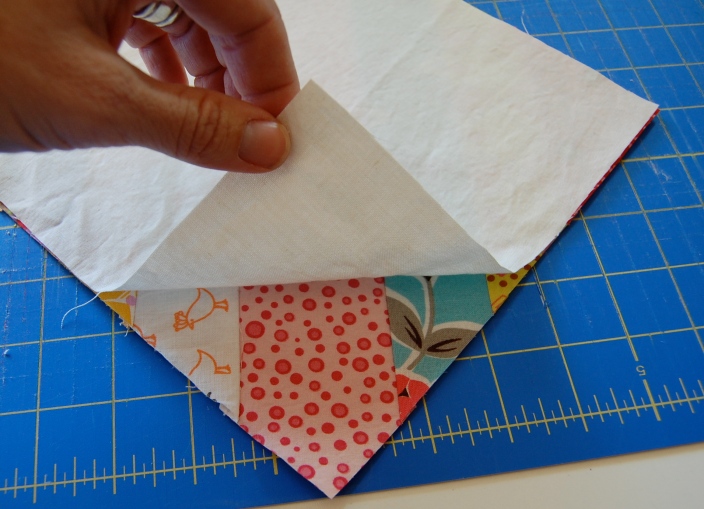
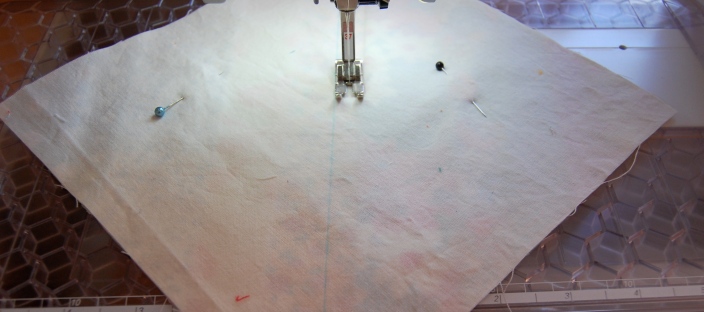
Place your solid block on top of your right side up pieced square, being careful to line them up well.
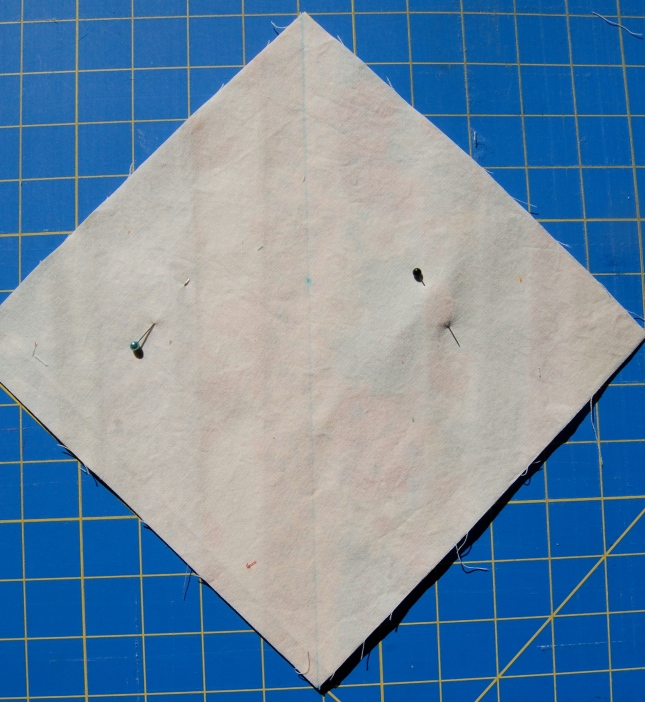
Next you’ll find the center diagonal line with your ruler, then mark it with a disappearing ink marker (sorry mine is kind of hard to see here). I like to place a pin on either side of this line.
Step 7:
Sew 1/4 inch from this drawn line.
Then turn your square and sew 1/4 inch on the other side of the drawn line (shown here on a different block-just to avoid any confusion).
Step 8:
Now you are ready to remove your pins and cut on the line, using your ruler to guide you.
Step 9:
Here I press my seams open. They are just a bit bulky but will still press open.
I then trim my block to a clean 8 inches and call it finished!! You now have two lovely little 8 inch Scrappy Strings HSTs like the one shown here.
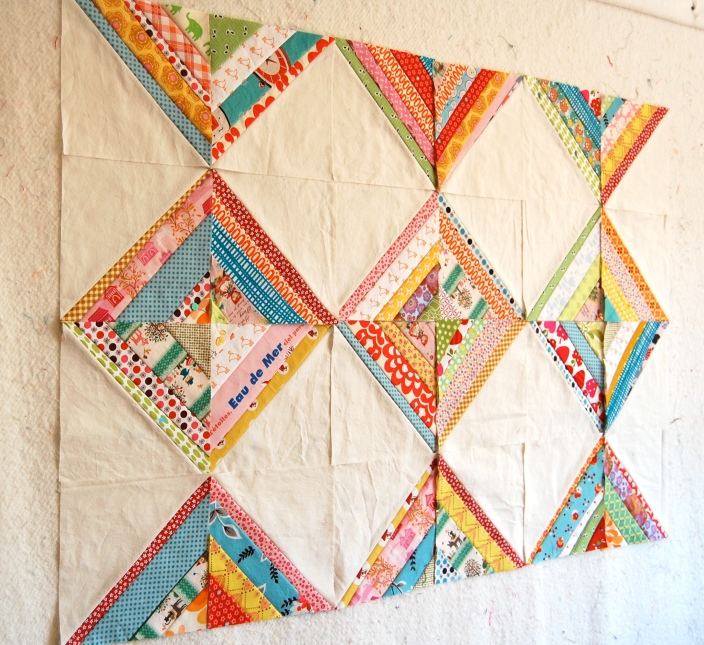
Now this tutorial wouldn’t feel complete without showing off some fun ways to use these squares. I don’t have an illustrator program and if I did would likely not know how to use it, so I just snapped a few layout options on my design wall to help you visualize how these could look in an overall design.
Layout #1
Layout #2
Layout #3
Layout #4
Layout #5
These are just a handful of simple ideas to get you thinking about options, but as many of you know, the possibilities with HST’s are seemingly endless. Have fun with it.
I hope you find this tutorial helpful and that if you try this method, you have as much fun with it as I do! If you are interested, I now have two quilt patterns that use modified versions of this method. Please find the Connection and the Bodhi Quilts PDF patterns in my shop!
