Welcome back friends! I’m so glad you’re here. Last week was the week to finalize your fabric pull and make sure you have the appropriate amount of fabric needed for the size quilt you have chosen to make. This information is found on page 1 of your pattern as well as in the Week 1 post! And one quick bit of fun news, in planning ahead, keep in mind that the oh so talented Jill of J Coterie Quilting is offering 20% off edge to edge quilting on your small lap size or larger Journey Home quilt!!

My fabric pull consists of some of my favorite Kona solids from Superbuzzy and a variety of other solids from Hawthorne Supply Co, as well as this sweet floral print from Mindy Young of Indybloom Design.
Before you start to cut your fabric, you’ll want to assign each one a letter as I have done in the pattern. Please notice in Week 1 post how I broke this new pull down into manageable parts. Keep in mind that my pull is kind of excessive, I seem to like to make things harder for myself than they need be-LOL. You can certainly keep it more straight forward and simply swap out colors 1 to 1.

An optional step for those ultra organized quilters out there would be to make a swatch chart to which you can refer throughout the cutting and construction of the quilt. The other way would just be to write it out on a paper in a way that you understand (I am not sure of the exact fabric for D1 as it came from my very old stash bin).
So let’s talk about cutting fabric! Since I show you the cutting chart for fat eighths in the pattern, I’ll focus here on yardage cutting. If you are using fat quarters for your quilt, you’ll notice that you can simply cut double the amount from those as you would for the fat eighth. Just be aware that you’ll need to be pretty exacting with your cuts as it is a close fit!
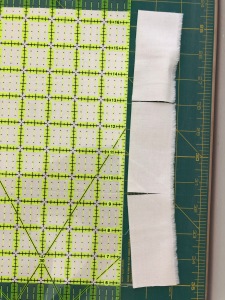
- Cut Vertical Strips in folded fabric (only two strips shown here).
- Cut off the fold at the bottom.
- Discard folded edge and sub cut horizontally.
- Selvedge edge is discarded.
There are so many ways that quilters like to cut their yardage. This is how I like to do it and how I cut it specifically for this quilt. For many of you more experienced quilters, this information will not be necessary. Keep in mind, if you prefer to cut differently that is fine. I offered generous fabric requirements so likely no matter how you cut, you’ll have enough fabric! I start with my yardage folded WOF wise (fold facing me) selvedges together, and vertically cut strips. I then sub cut those strips, horizontally, into the squares that I need and cut the folded edge off .

For example, if I need 32 3 3/4″ squares, I would cut 3 strips plus one more small 3 3/4″ section of a strip perpendicular to the selvedge edge or vertically (with my yardage folded). Then sub cut 3 3/4″ squares horizontally. I should be able to get 5 cuts across all strips, which, since the fabric is folded, gives me 10 squares per strip. In this case, I will end up with 32 squares! The selvedge extra at the top is for the scrap bin.

When you have all of your squares cut, a great next step is to label each stack with a letter and tag of what square it is, i.e. background, HST, corners, center square, or just the size. Whatever works for you in terms of labels. This is an important step, if you’re going to leave your work and come back to it. This way you can pick up right where you left off.
Okay! Have a great week. Don’t forget to post your beautifully cut and stacked squares and tag me (and #journeyhomeqal) so I know you posted! Also, if you haven’t already, you may want to consider purchasing the Quilt in a Day 6 1/2″ Square It Up Ruler for next week’s work of constructing the main block unit!

Project Wool Mat
And keep an eye out for more IG posts and stories throughout the week as well as the announcement of our Week 2 prize winner over the weekend! This week’s prize is a Hera Marker AND a generously donated pressing mat from the awesome folks at Project Wool! Two of my most favorite quilting tools. Those who post are eligible to win!
As always, email me or comment here with questions or anything you’d like to share!


